Secure Shell (SSH) is a critical component of modern network management, providing a secure method for remote access to network devices like Cisco Catalyst 1300 Series switches. Unlike older protocols such as Telnet, SSH encrypts all communications, ensuring that sensitive information such as login credentials and configuration commands are protected from potential eavesdropping. For network administrators, enabling SSH on Cisco Catalyst 1300 switches is an essential task that enhances both security and operational efficiency.
In this comprehensive guide, we will explore the importance of SSH, walk you through the steps to enable SSH on Cisco Catalyst 1300 Series switches, and discuss best practices for managing and securing SSH access on your network.
Why Enable SSH on Cisco Catalyst 1300 Series Switches?
SSH is a secure protocol used to establish encrypted connections between network devices and administrators. It replaces older, insecure protocols like Telnet, which transmit data, including passwords, in plaintext. Here’s why enabling SSH on your Cisco Catalyst 1300 Series switches is crucial:
1. Enhanced Security
The primary advantage of SSH is its strong encryption, which protects against various security threats, including man-in-the-middle attacks, eavesdropping, and unauthorized access. By using SSH, you ensure that any data exchanged between the administrator and the switch is secure.
2. Remote Management
SSH allows network administrators to remotely manage Cisco Catalyst 1300 Series switches, enabling them to configure, monitor, and troubleshoot devices from any location. This flexibility is particularly valuable in large or distributed networks where physical access to every switch is impractical.
3. Compliance
Many industries have strict compliance requirements regarding data security and network management. Enabling SSH on your network devices helps ensure that your infrastructure meets these regulatory standards, reducing the risk of non-compliance penalties.
4. Logging and Auditing
SSH enables detailed logging of all commands entered during a session. This logging capability is essential for auditing purposes, allowing administrators to track changes, monitor user activity, and maintain a history of all management actions performed on the switch.
Prerequisites for Enabling SSH on Cisco Catalyst 1300 Series Switches
Before enabling SSH on your Cisco Catalyst 1300 Series switch, you need to ensure that the following prerequisites are met:
- Access to the Switch CLI: You should have either console or Telnet access to the switch’s command-line interface (CLI).
- Configured Hostname: The switch must have a configured hostname.
- Domain Name: A domain name must be configured on the switch.
- RSA Key Pair: SSH requires the generation of RSA keys, which necessitates configuring a key modulus size.
- Local Username and Password: A local username and password must be configured to authenticate SSH sessions.
Step-by-Step Guide to Enabling SSH on Cisco Catalyst 1300 Series Switches
Follow these steps to enable SSH on a Cisco Catalyst 1300 Series switch:
Step 1: Access the Switch via CLI
First, access the switch through its CLI. This can be done via a direct console connection, Telnet, or an existing SSH session if SSH is already enabled.
Switch> enableSwitch# configure terminal
Step 2: Configure the Switch Hostname
Assign a unique hostname to the switch. The hostname is used to identify the switch and is required for SSH configuration.
Switch(config)# hostname C1300-SwitchC1300-Switch(config)#
Step 3: Set the Domain Name
Set the domain name for the switch. This is necessary for generating the RSA key pair required for SSH.
C1300-Switch(config)# ip domain-name example.com
Replace example.com with your organization’s domain name.
Step 4: Generate the RSA Key Pair
Generate an RSA key pair that will be used to encrypt SSH sessions. The key modulus size determines the strength of the encryption; a minimum of 1024 bits is recommended, but 2048 bits is more secure.
C1300-Switch(config)# crypto key generate rsaThe name for the keys will be: C1300-Switch.example.comChoose the size of the key modulus in the range of 360 to 4096 for yourGeneral Purpose Keys. Choosing a key modulus greater than 512 may takea few minutes. How many bits in the modulus [2048]: 2048
After running this command, the switch will generate the RSA keys, which may take a few moments depending on the chosen key size.
Step 5: Configure SSH Version
It’s important to use the latest SSH version available on your switch. Cisco devices typically support SSH Version 2, which is more secure than Version 1.
C1300-Switch(config)# ip ssh version 2
Step 6: Create a Local User Account
Create a local user account that will be used to authenticate SSH sessions. It’s best practice to use a strong password to enhance security.
C1300-Switch(config)# username admin privilege 15 secret [your-strong-password]
Replace [your-strong-password] with a secure password of your choice.
Step 7: Enable VTY Lines for SSH Access
Virtual Terminal (VTY) lines are used to manage remote access to the switch. Configure the VTY lines to accept SSH connections and specify the local user database for authentication.
C1300-Switch(config)# line vty 0 4C1300-Switch(config-line)# login localC1300-Switch(config-line)# transport input sshC1300-Switch(config-line)# exit
Step 8: Save the Configuration
Finally, save the configuration to ensure that your changes are retained even after the switch reboots.
C1300-Switch(config)# endC1300-Switch# write memory
Verifying SSH Configuration on Cisco Catalyst 1300 Series
After enabling SSH, it’s important to verify that the configuration is correct and that SSH is functioning as expected. Here are some verification steps:
1. Check the SSH Status
Use the following command to verify that SSH is enabled and running on the switch:
C1300-Switch# show ip ssh
This command provides information about the SSH version, authentication timeout, and key exchange attempts.
2. Test SSH Access
To confirm that SSH is working, attempt to connect to the switch using an SSH client like PuTTY or the ssh command in a terminal:
ssh [email protected]
Replace admin with your configured username and 192.168.1.1 with the IP address of the switch.
3. Review SSH Sessions
You can also review active SSH sessions on the switch using:
C1300-Switch# show ssh
This command displays details about current SSH connections, including the username, IP address of the client, and session status.
Best Practices for Managing SSH on Cisco Catalyst 1300 Series Switches
To ensure that your SSH configuration remains secure and effective, follow these best practices:
1. Use Strong Passwords and Authentication
Always use complex, strong passwords for SSH user accounts. Consider using multi-factor authentication (MFA) for added security, which requires users to provide additional verification beyond just a password.
2. Regularly Update SSH Keys
Periodically regenerate RSA keys to maintain strong encryption. Updating keys reduces the risk of compromise over time, especially in high-security environments.
3. Restrict SSH Access
Limit SSH access to trusted IP addresses or subnets using access control lists (ACLs). This reduces the attack surface by preventing unauthorized users from even attempting to connect via SSH.
C1300-Switch(config)# access-list 10 permit 192.168.1.0 0.0.0.255C1300-Switch(config)# line vty 0 4C1300-Switch(config-line)# access-class 10 inC1300-Switch(config-line)# exit
4. Monitor SSH Logs
Enable logging of SSH sessions and regularly review the logs for any unusual activity. This helps in early detection of potential security incidents.
5. Disable Unused VTY Lines
If your switch has more VTY lines than necessary (e.g., more than the default five lines), consider disabling the unused ones to reduce potential entry points for attacks.
C1300-Switch(config)# line vty 5 15C1300-Switch(config-line)# transport input noneC1300-Switch(config-line)# exit
6. Keep Firmware Updated
Ensure that your switch's firmware is always up to date. Cisco frequently releases updates that patch vulnerabilities and improve SSH security.
Troubleshooting SSH Issues on Cisco Catalyst 1300 Series
Even with careful configuration, SSH issues may occasionally arise. Here’s how to troubleshoot common problems:
1. Connection Refused
If your SSH connection is refused, check the following:
- Ensure SSH is enabled (ip ssh version 2).
- Verify that the VTY lines are configured to accept SSH (transport input ssh).
- Check for IP restrictions that might be blocking access.
2. Authentication Failures
If you are unable to log in via SSH, ensure:
- The correct username and password are being used.
- The local user account is correctly configured.
- The RSA keys were generated properly.
3. Slow SSH Performance
If SSH performance is slow, it may be due to:
- High CPU utilization on the switch. Use show processes cpu to check.
- Network latency or congestion. Ensure that the network path between the client and switch is optimal.
Conclusion
Enabling SSH on Cisco Catalyst 1300 Series switches is a fundamental step in securing your network infrastructure. By following the steps outlined in this guide, you can configure SSH securely, allowing for encrypted remote access that protects sensitive data and complies with security standards. Remember to follow best practices such as using strong passwords, restricting access, and regularly updating keys to maintain a robust and secure network environment.
With SSH enabled, your Cisco Catalyst 1300 Series switches will be well-protected, ensuring that only authorized personnel can manage and configure your network devices remotely. This not only enhances security but also improves the efficiency and flexibility of your network management practices.
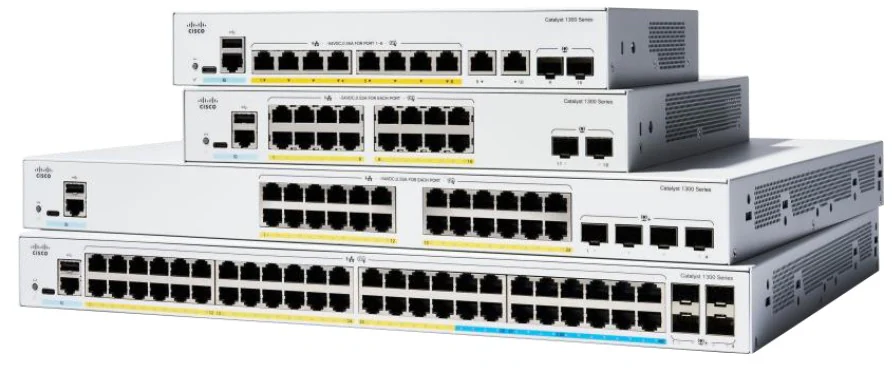
Cisco Catalyst 1300 Series Switches
For Cisco product list and quote, please visit: https://www.hi-network.com/categories/cisco or contact us at www.hi-network.com (Email: [email protected])